NetBeans is an Integrated Development Environment (IDE) written in Java. It can be used to edit Java files, it contains an integrated compiler, a debugger, etc.
Using SSJ with NetBeans simply requires the setup of the build path in order to tell NetBeans where the classes can be found. A one-time setup is needed to link NetBeans with the classes, and a project-specific part adds SSJ to a project's build path. We will now detail these two steps. This procedure was tested with NetBeans 8.0, but it may work with newer versions of NetBeans. It should also work for using other third-party libraries with NetBeans.
See the home page and on-line help of NetBeans for more information on how to use this IDE.
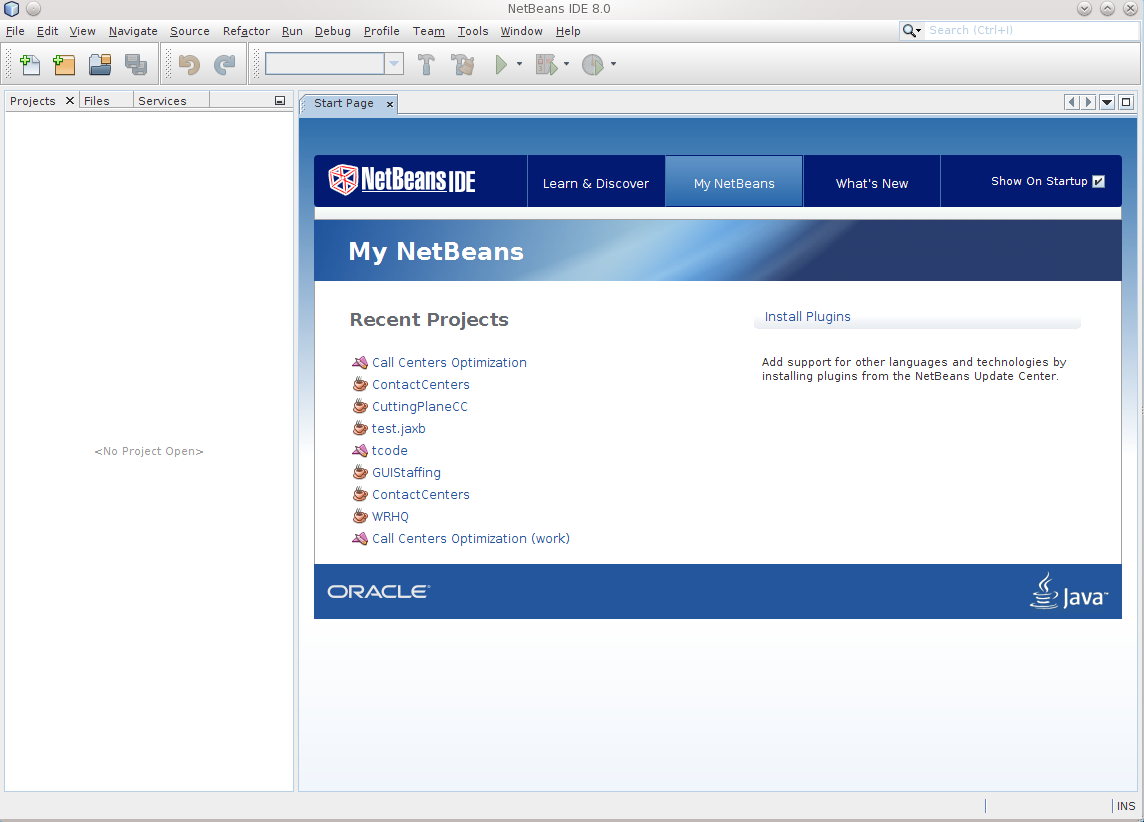
When NetBeans is launched, a window similar to the next figure comes up.

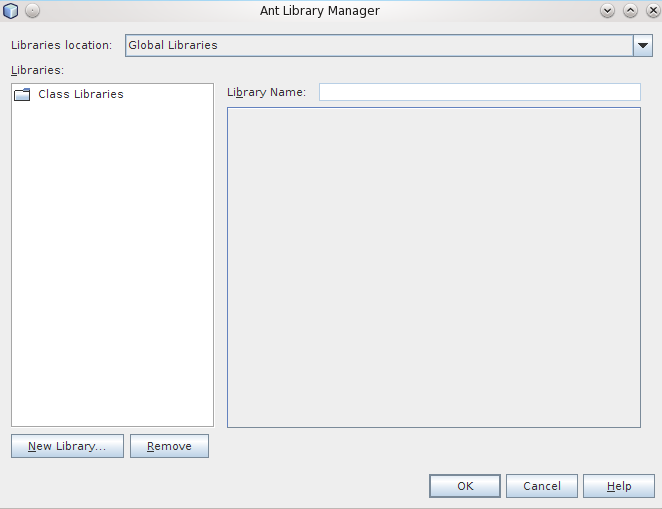
To open the library manager, go to the menu <Tools> and select <Libraries>.

The library manager will appear, like in the next figure.

Click on the button <New Library...>. A dialog box similar to the next figure will appear, asking for the name of the new library. Any meaningful string, e.g., SSJ, can be entered for the library name.

After the <OK> button is pressed, the library is added and selected. Use the button <Add JAR/Folder...> to add the JAR files into the library. The user must select all JAR files in the lib subdirectory of SSJ. The next figure shows the library SSJ with the JARs.

After the archives are added, the library manager can be closed by pressing the <OK> button.
A project can be created using the <New Project> command in the <File> menu. Select <Java application> in the dialog box that appears, and follow the instructions. After a project is created, it can be set up to use SSJ as follows.
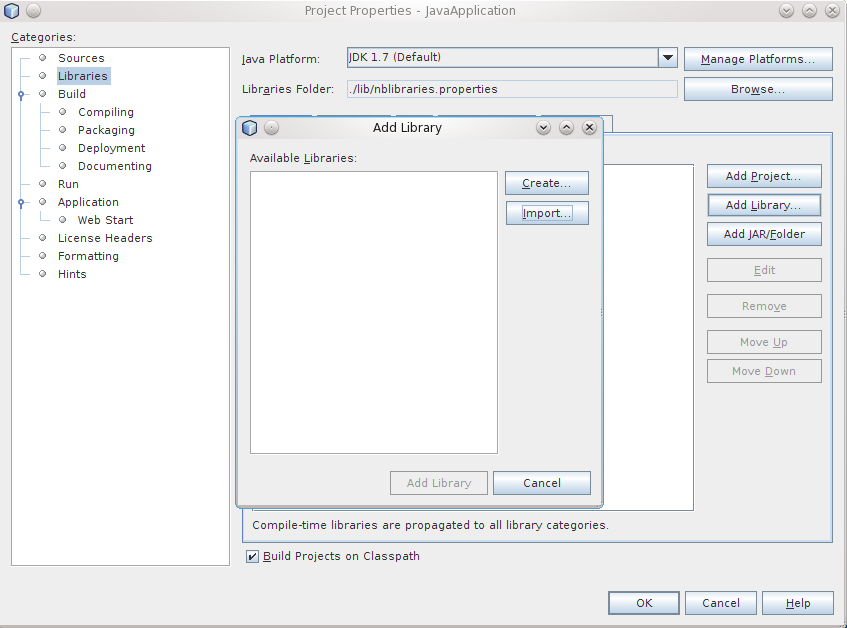
In the Project tab of NetBeans, do a right-click on the name of the project that should use SSJ, and select <Properties> in the context menu that comes up. Then select the <Libraries> item in the left part of the dialog box that comes up, and click on the button <Add Library...>. This results in a window similar to the next figure.

In the dialog box Add Library, click on the button <Import...> and the dialog box Import Library will pop up, like in the next figure.

Select the library SSJ and click on the button <Import Library>. The library SSJ will now appear in the list, like in the next figure.

Select the library SSJ from the list and press the button <Add Library> to add SSJ to the project.
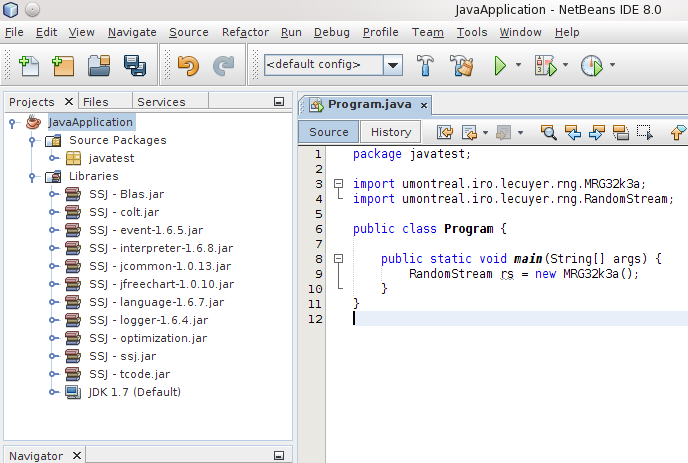
The Project Properties window can now be closed by pressing the <OK> button. The user should see the JARs from SSJ inside the folder Libraries in the Projects tab, like in the next figure.

The project can now use the library SSJ, as shown by the example file Program.java.